
Setting up your laptop for the first time
The first time you turn your laptop on, Windows 11 asks a series of questions to get itself ready for you. This only happens once, and none of the questions are hard. This guide walks you through every screen, in order, so you always know what to expect.
Before you start, have these ready
- Your laptop and its charger.
- About 30 to 60 minutes. Windows does a lot of thinking the first time it starts, so it's a good idea to make a cup of tea.
- Your Wi-Fi network name and password. They're usually printed on a sticker on your internet modem.
- An email address, if you already have one. If you don't, that's fine. You can create a free one during setup.
- 1
Plug in and turn on
Plug the charger into a power point and into your laptop, and leave it plugged in for the whole setup. Open the lid and press the power button. It's usually above the keyboard or on the side edge, marked with a circle with a small line through the top. After a few seconds you'll see a logo, then the first setup screen.
- 2
Choose your country
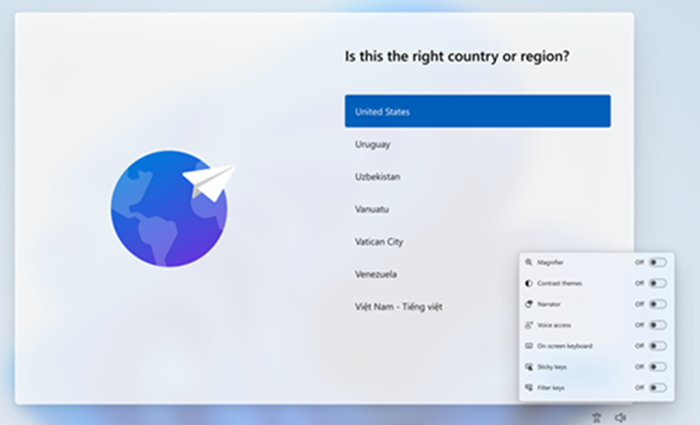
The first question is "Is this the right country or region?" Scroll through the list until you find Australia, click it so it's highlighted, then click Yes. The screen below shows what this looks like (yours will show Australia in the list).
- 3
Confirm the keyboard
Next, Windows asks "Is this the right keyboard layout or input method?" Leave it set to United States. That sounds odd, but it's the standard layout for Australian keyboards, so don't change it. Click Yes. When it asks if you want to add a second keyboard layout, click Skip.
- 4
Connect to the internet
On the "Let's connect you to a network" screen, click your Wi-Fi network in the list, click Connect, and type your Wi-Fi password exactly as it appears on your modem sticker. Capital letters matter. Then click Next.
Windows 11 needs the internet to finish setting up, so this step can't be skipped. If you don't have Wi-Fi at home, you can use your mobile phone as a hotspot. Our internet guide explains both, including where to find your Wi-Fi password.
- 5
Let it check for updates
Once it's online, the laptop checks for updates. It may sit on this screen for a while and restart itself once or twice. This is completely normal. Don't press anything and don't close the lid, just let it work. If a licence agreement appears, click Accept.
- 6
Sign in with a Microsoft account
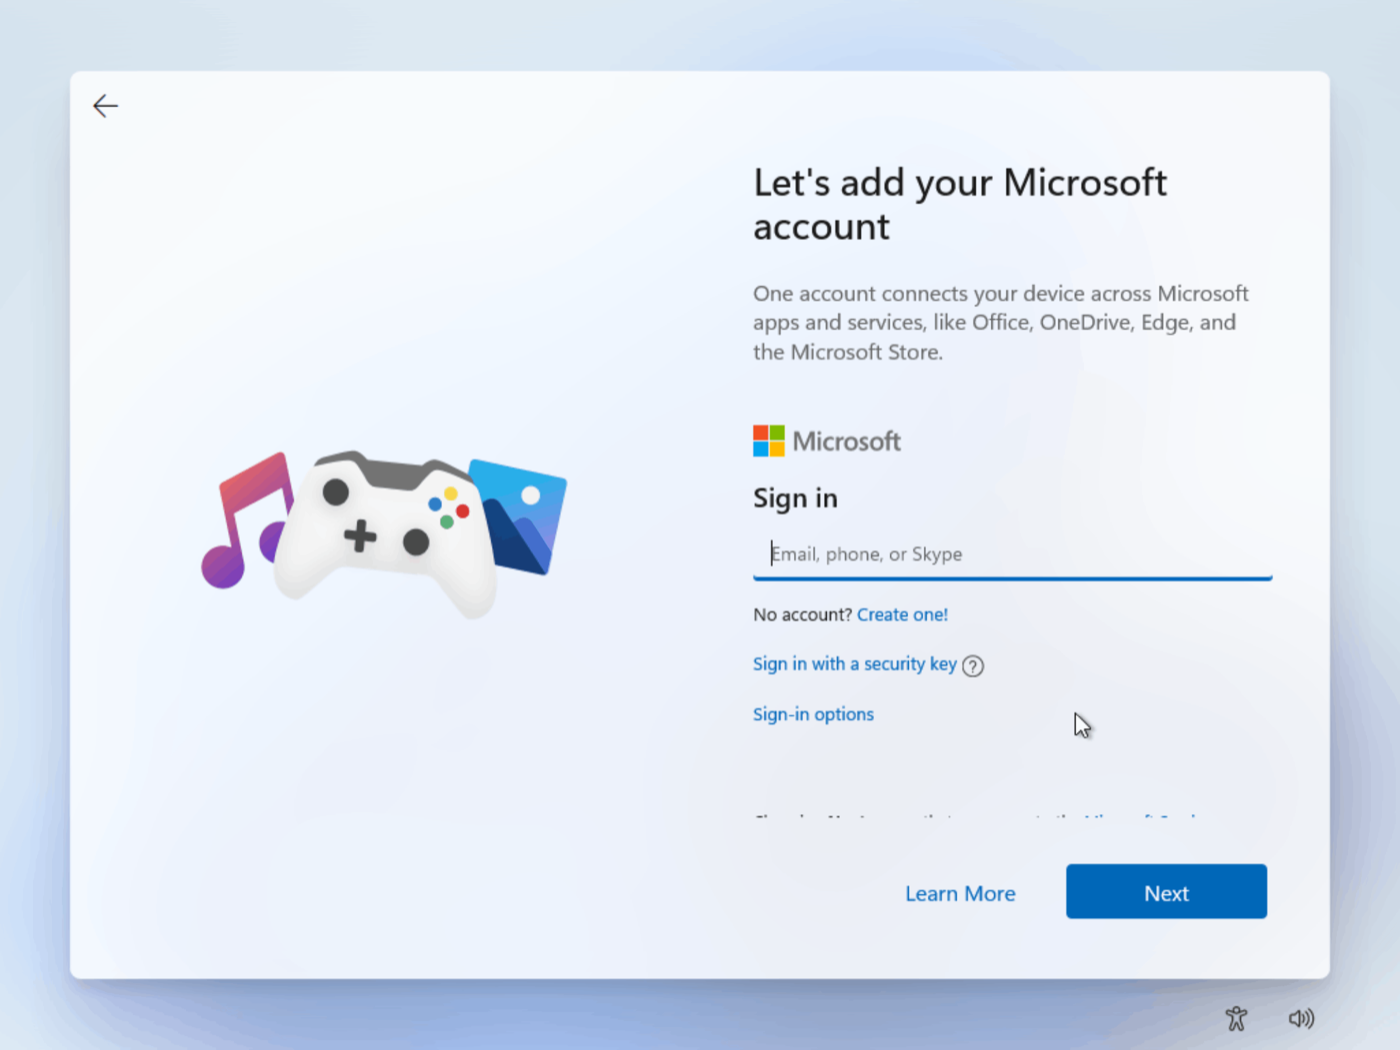
Windows now asks you to sign in with a Microsoft account. This is a free account that unlocks email, free online versions of Word and Excel, and online file storage.
- Already have one? If you've used Outlook, Hotmail, Xbox, or Skype before, you have a Microsoft account. Type that email address and password.
- Don't have one? Click Create one! You can use an email address you already have (like a Gmail address), or choose Get a new email address to make a free Outlook one. Follow the prompts to pick a password.
Important: write the email address and password down on paper and keep it somewhere safe. You will need them again, and they're the key to everything on your laptop.
- 7
Create a PIN
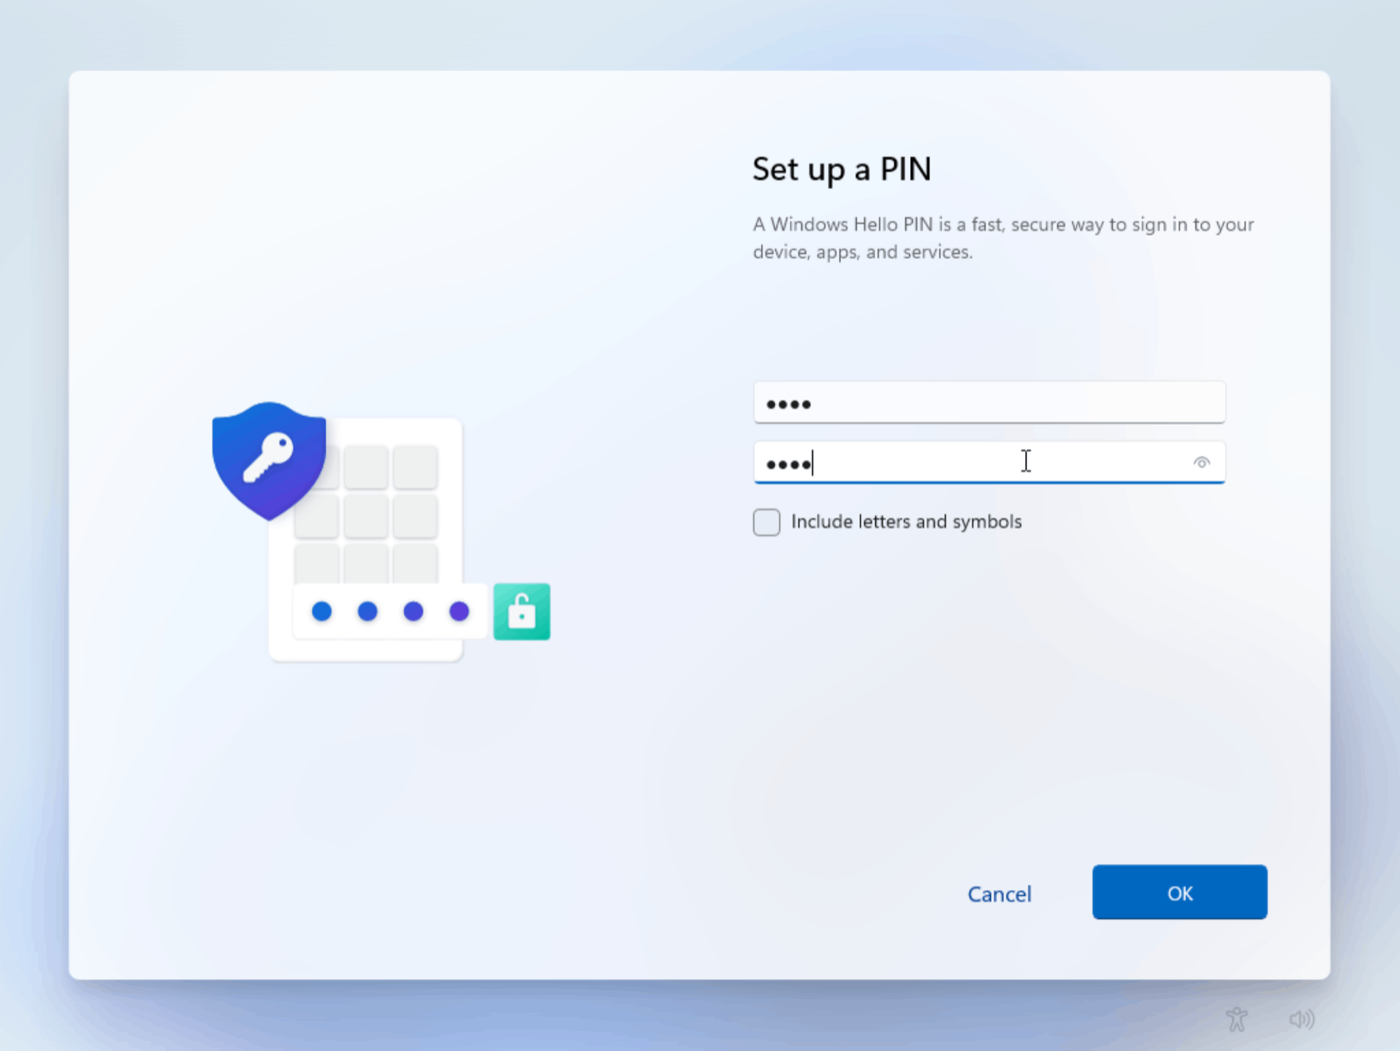
Windows asks you to create a PIN, a short number code you'll use to unlock the laptop each day instead of typing your full password. Click Create PIN, type a number code you'll remember (at least four digits), type it again to confirm, then click OK. Avoid easy-to-guess codes like 1234 or your year of birth, and write this one down too.
- 8
Answer the privacy questions
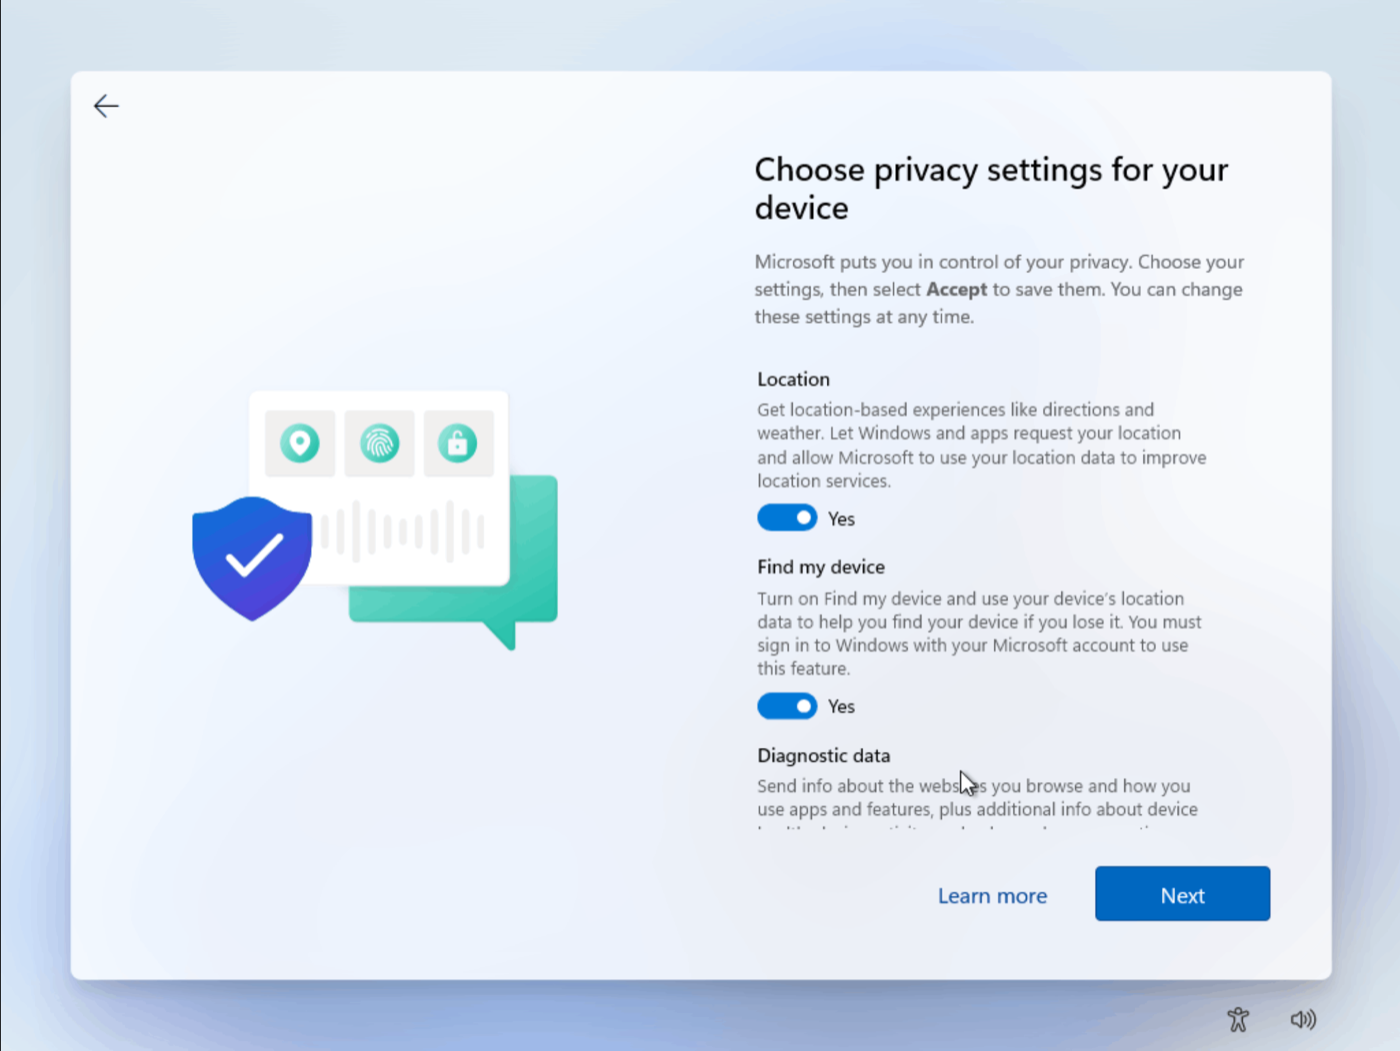
Windows shows a screen called "Choose privacy settings for your device" with a list of switches, like location and diagnostic data. There are no wrong answers here. If you're not sure, it's perfectly fine to leave them as they are, or switch them all off. Then click Accept.
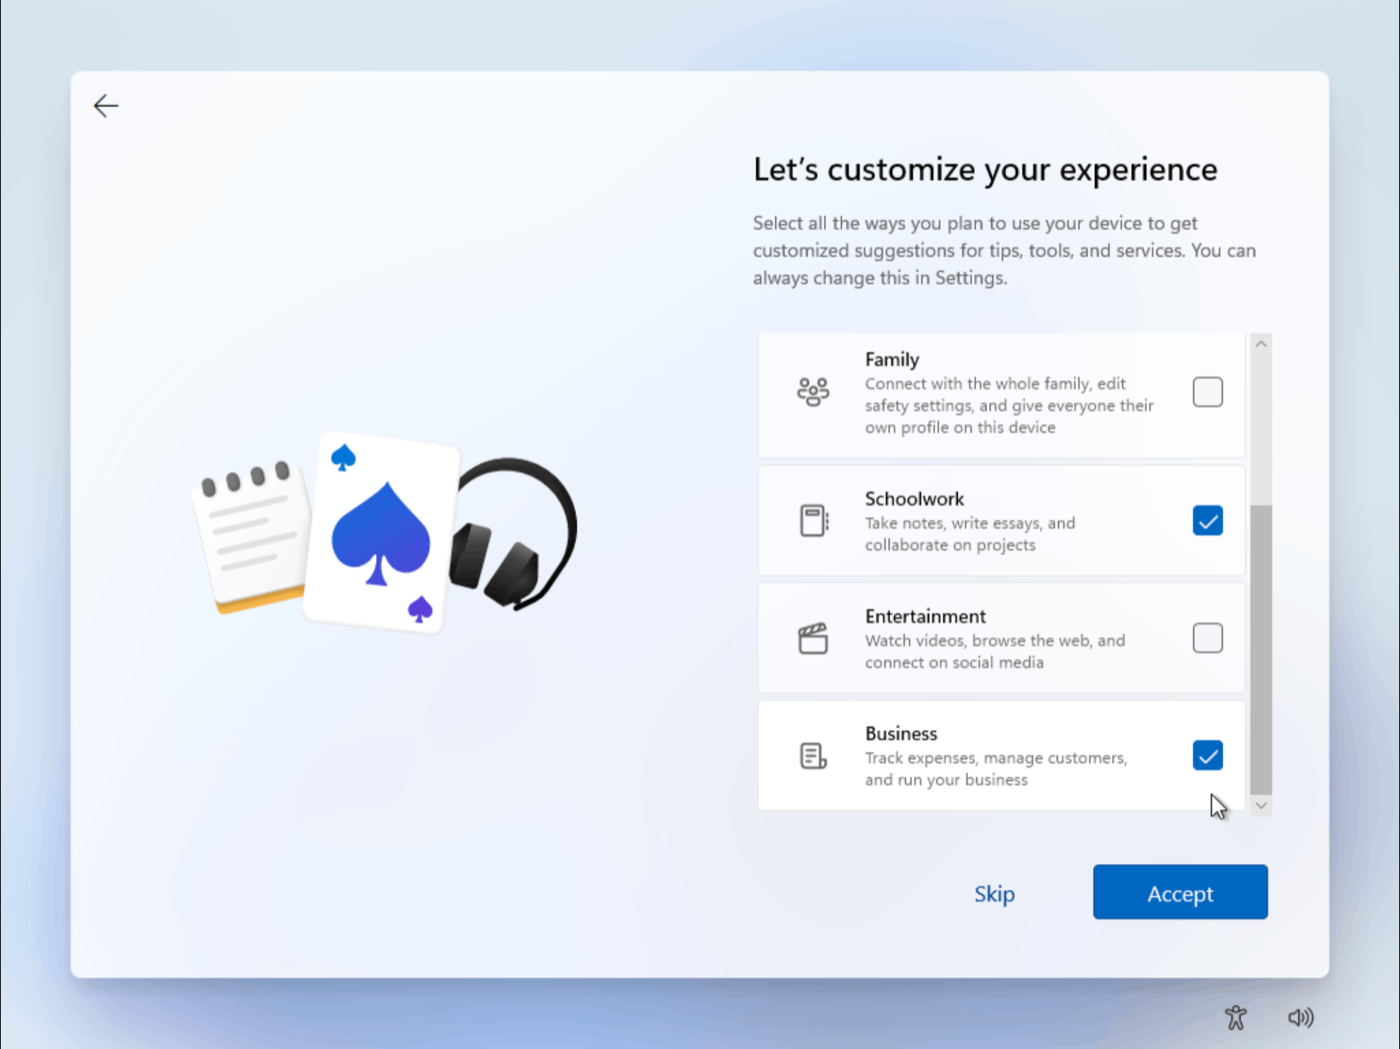
After this, Windows may ask a few extra questions, like how you plan to use the PC, whether you want OneDrive backup, or offer free trials of Microsoft 365 or Game Pass. You can click Skip, Not now, or Decline on all of these. Nothing bad happens, and you can always change your mind later.
- 9
Wait for the final setup
You'll see a screen saying something like "This might take a few minutes" or "Getting things ready for you". The laptop is putting everything in place. Keep the charger plugged in and don't turn it off. This usually takes 5 to 15 minutes.

- 10
You're done!
When you see the desktop, a picture with a bar of icons along the bottom, your laptop is ready to use. The Windows logo button at the bottom of the screen opens the Start menu, where you'll find all your apps. A great first stop is office.com in your web browser, where you can use Word and Excel for free with the Microsoft account you just created.
Stuck on one of these steps?
That's what we're here for. Tell us which step you're stuck on and we'll walk you through it.
Ask for help